This is an odd recipe and may not sound that great but it actually is a lot better than it sounds. I wanted something easy to make with things that we had in the apartment. A lot of the ingredients can be substuted for something else if you do not have the actual ingredient.
For 1-1 and 1/2 pounds of chicken
Ingredients:
3/4 cup smooth peanut butter
2/3 cup of apple cider vinegar
2/3 cup of vegetable/canola oil
2 tablespoons brown sugar
2 tablespoons soy sauce
1 tablespoon fresh mint, chopped or 1 teaspoon dry
1 teaspoon ground black pepper
3/4 teaspoons salt
1/4 teaspoon Cayenne
2 cloves of garlic, minced
Procedure:
Whisk well in a large bowl until the mixture resembles a creamy peanut butter.
Using a mallet pound out your chicken breasts between two layers of saran wrap to your desired thickness.
You can use a large ziploc bag to marinade or stick the chicken right in the bowl. Cover and refrigerate. The longer you can marinate, the better.
Baste with sauce while grilling, discard leftover sauce.
Monday, November 29, 2010
Saturday, November 27, 2010
Ecclair Cake

I remember making it for her. That was her way of saying "Can you make one for me again...?" =)

Ingredients:
A box of graham crakers
A box of Instant Vanilla Pudding
8 Oz. Cool whip
1 can of Chocolate Icing
1. Line the bottom of a 13x9 pan with the graham crackers, broken in half.
2. Mix the pudding according to the box, and add the whip cream.
3. Pour the pudding and whip cream mixture onto the graham crackers.
4. Add another layer of graham crackers.
5. Melt the icing in the microwave, 30 seconds.
6. Spread it on the top, and put in the refrigerator.
7. Let it sit 4 or 5 hours in the fridge. The longer the better, because the crackers will become soft.
8. Serve, and devour! =)
Thursday, November 25, 2010
Turkey Lurkey!
We felt this post needed a disclaimer, so first things first....
 So, this is the first turkey Ashley and I cooked in the new apartment. The turkey was cheap, and at 45 cents per pound...it was hard to pass up. Searched for a recipe online, and had to make a change since we didn't have enough olive oil. This change will now go into every turkey we do. We pulled it from here , and the changed steps are as follows:
 Ingredients:
 3. Mix all of the ingredients for the sauce together in a bowl, and set aside.
--Ronnie
DISCLAIMER: Please do not hate us for the wonderful smells that will be coming from your oven after the first 30+ minutes of cooking. We are really sorry, and don't worry...you will be able to eat it soon enough.
Phew, glad that's out of the way.


Sauce:
1/4 cup Olive Oil
1/2 cup Sesame Oil
3 Tablespoons minced Garlic
2 Tablespoons chopped Parsley (Fresh works, too)
1 Tablespoon chopped Basil (Fresh works, too)
1 Tablespoon Italian Seasoning
1 Teaspoon Black Pepper
Salt to Taste (1 Teaspoon)
For Turkey:
1 cup of wine (White, used a chardonnay from Wal Mart. Only 3 bucks a bottle)
1 Turkey (10-15 pounds)
1. Pre-heat the oven to 350.
2. If your turkey has them, pull out the guts. The neck and gizzards were in a nice little package, which made clean up very easy.
 3. Mix all of the ingredients for the sauce together in a bowl, and set aside.
 4. Put the turkey into a pan for cooking.
5. Time to get under your turkey's skin...litterally! Loosen the skin from the breast. This is done by slowly working your fingers between the breast and the skin. Go all the way to the drumstick, but be careful not to tear. Don't want a holey turkey.
6. Take the sauce, and work it under the skin. Make sure to get the inside and outside of the turkey, as this is needed for more flavor.
7. Take the cup of wine, and add it to the bottom of the pan. This will help keep the turkey moist, and give it an amazing flavor at the end.
8. Put it in the oven. For cooking time, ours was done in about 2 hours and 45 minutes, and we pulled it out once the pop-up timer popped. (HowStuffWorks = win)
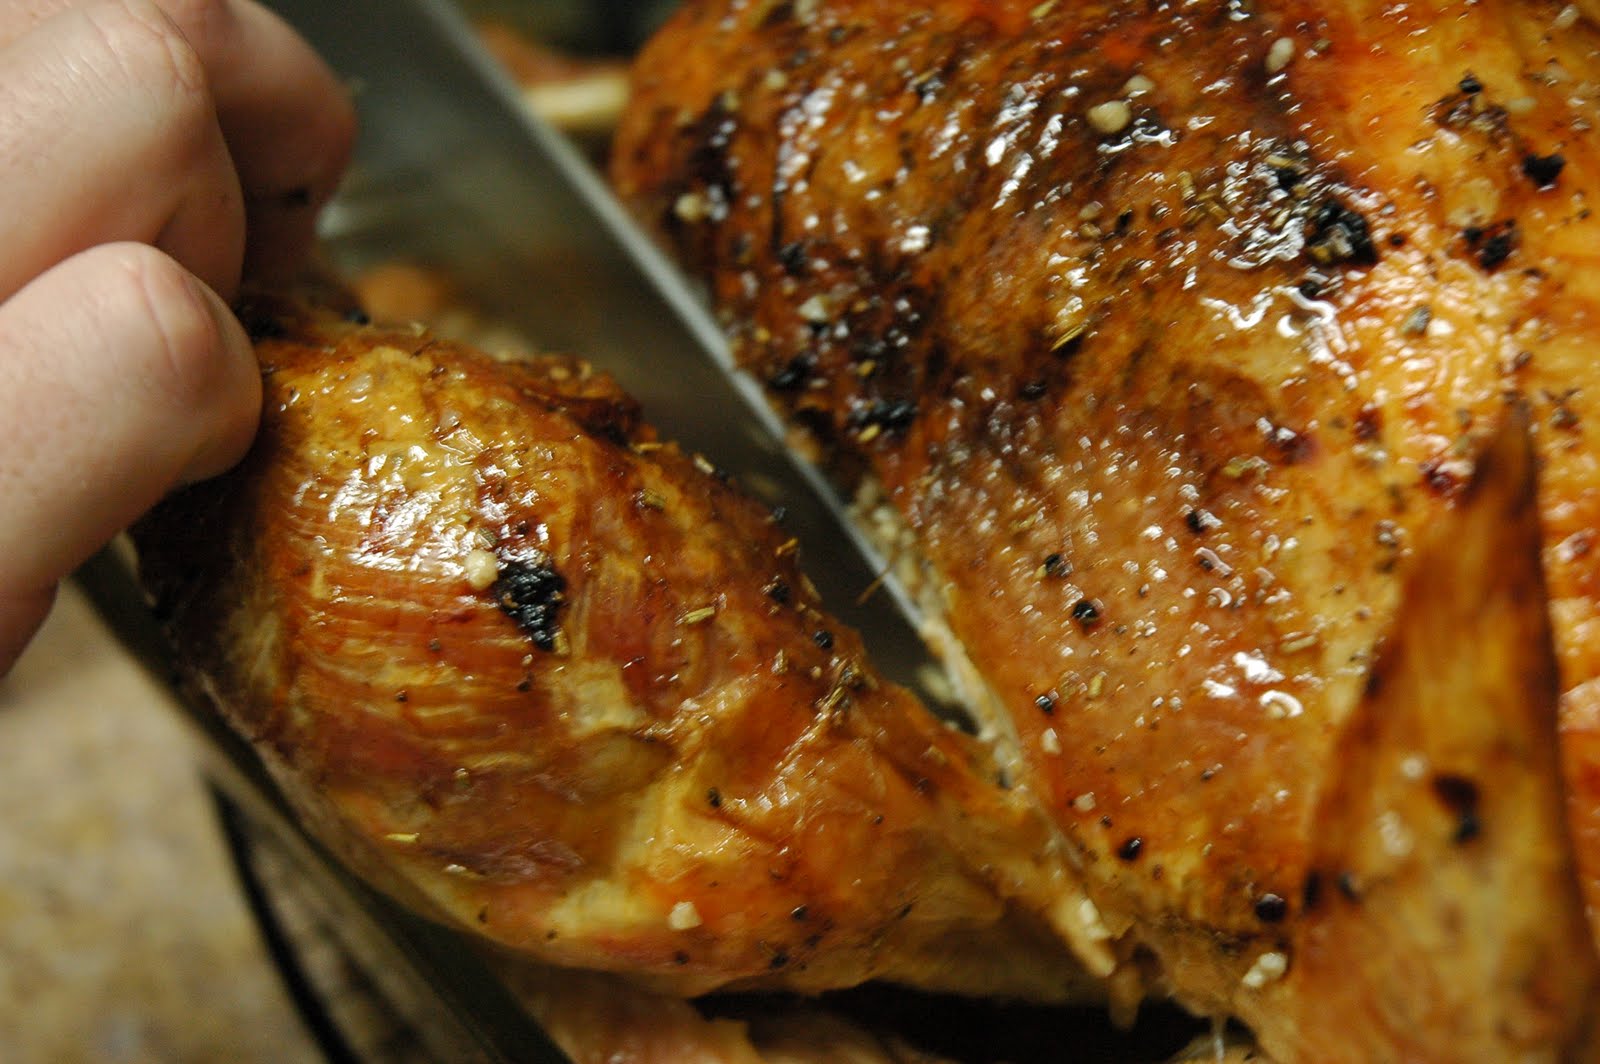
9. Let it cool for an eternity, 30 minutes. Carve the turkey, and eat! =)
--Ronnie
Monday, November 22, 2010
Classic Baked Acorn Squash
This is an amazing fall recipe, as the squash cooks you the house smells like fall. When choosing a squash make sure that it is heavy for its size and is a deep colour. These squash are great sources of iron, riboflavin and vitamins A and C. The vitamin C will also help boost your immune system for the colder flue season.

INGREDIENTS:
- 1 Acorn squash
- 1 Tbsp Butter
- 2 Tbsp Brown Sugar
- 2 teaspoons Maple Syrup
- Dash of Salt
Procedure:
Preheat oven to 400°F.
- Cut the squash in half lengthwise, this will be difficult so make sure that you are using a very sharp knife, you may even need to use a mallet.
- Scoop out the seeds and strings from the center of the squash.
- Score the inside of the squash, you can use a sharp knife or a fork for this. (The scoring allows the butter to penetrate the squash during baking.
- Place each half in a baking pan, cut side up. Add about a 1/4 inch of water to the bottom of the baking pan so that the skins don't burn and the squash doesn't get dried out.
- Coat the inside of each half with 1/2 a Tbsp of butter. (if you are using unsalted butter you may want to add a pinch of salt).
- Add half the brown sugar and maple syrup to each cavity.
- Bake in the oven for 1 hour to 1 hour 15 minutes, until the squash is very soft and the tops are browned.
- Every 15-20 minutes check on the squash if the tops are drying out spoon some of the sauce onto the exposed areas.
Easy cinnamon and Brown Sugar Pancakes

Ashley rarely eats breakfast, the reason being she hates to wake up early. One way to get her out of bed is with some liquid motivation, followed by the smell of yuminess. In comes a cup of fresh brewed coffee and cinnamon and brown sugar pancakes. These work especially well when your significant other is still asleep, and presented both of them simultaneously, in a surprise-like fashion. ;)

Ingredients:
1 1/4 Cups of milk
2 Teaspoons of Cinnamon
1 Tablespoon of Brown Sugar (More depending on your taste)
Butter for cooking
Syrup:
Syrup for dipping
Butter for the syrup
 1. Mix the jiffy and milk together in a bowl. Add the brown sugar and cinnamon to the mixture, and stir.
3. Using a tablespoon, scoop some onto the griddle. Once cooked, put onto a plate
4. In a small bowl for dipping, add some syrup with a pad of butter. Microwave for 30 seconds, or until the butter is melted.
5. Serve to your significant other, and watch it light up their day. =)
Thursday, November 18, 2010
Lemon pie with Lemon crust

The Crust
Ingredients:
6 Tbsp butter, melted (can do this in microwave but only do for 10sec intervals)
1/4 Cup sugar
1 1/2 Cups crushed lemon snaps
 Procedure:
Preheat oven to 350.
Add sugar and crushed snaps together.
Add melted butter and blend with hands.
Press into a pie dish.
Back in oven for 8-10 minutes.
let cool before you use, also this crust will not be very firm so I would recommend leaving it in the pan.
The Filling
Ingredients:
2 packets of lemon pudding
3 1/2 Cups of Cold milk
1 tub of cool whip

Whisk together the pudding and milk.
Let set before pouring into a cooled pie crust.
Let the pie set 1-3 hours, depending on how long the pudding has set before putting in a pie crust.
Once set you can either put the cool whip on the whole pie or individual slices.
What is your favorite type of pie?
Raspberry breakfast treats
I made these as a surprise for Ronnie one morning when I was actually up before him.

Ingredients:
Pillsbury cinnamon rolls
2-3 Tbsp Raspberry jam(seedless)
 Procedure:
Preheat oven to 350
1.) Unroll the dough and cover one side with the jam.
2.) Fold dough over on itself, then break apart along perforated edges.
3.) Twist each piece and seal the end.
4.) Place each piece on a slightly grease, or you can parchment paper, cookie sheet.
5.) Place in oven and cook for 12-15 minutes.
6.) Let cool and add icing as desired.
This turned out great, Ronnie loved them and so did I. The only real problem was that they were gone to soon. Also you can use any jam you want, I just choose the raspberry because its slightly bitter taste complimenting the sweetness on the cinnamon rolls.
What is your favorite breakfast treat?
Peanut butter + chocolate= excuse for wine

I originally wanted to make the round cookies with hershey kisses for Ronnie as a congratulations for all his hard work, but didn't have any kisses, so I found this recipe. It is really easy and just as tasty.

3 Tbsp oil
1 Tbsp water
1 egg
1 packet of peanut butter cookie mix
2 cups chocolate chips

Procedure:
- Preheat oven to 350
- Mix oil, water, egg, and mix together. The mixture will be drier than you may expect, but mix until smooth.
- In a 13x9 greased pan flatten the mixture down to create a crust.
- Place in the oven for 12-15 minutes, until the edges are golden brown.
- Take out and let cool for 5 minutes.
- While cooling, melt the chocolates chips in a microwave safe bowl. You can do this by placing in the microwave for 1-1.5 minutes. (I recommend stirring every 15-30 seconds).
- Pour the chocolate onto the peanut butter sheet.
- Let cool and enjoy.

Monday, November 8, 2010
Soup, Stew and Broth, Oh My!
With the colder weather settling the desire for a nice bowel of hot stew while watching the leaves fall keeps growing. Today, Ronnie and I decided to put our spoon to the pot and try making a stew, this however into also making a soup and a "bone" broth.
The Stew
(serves 8+)
The stew is a conglomeration of a couple different recipes plus a little of our own.
 |
| The spices/marinade step 1. |
3-4 cups water- "FREE" (add as needed)
3 beef ramen packets- Ronnie doesn't use the packets when he eats the ramen.
1 Cup red wine- $4 for the bottle (cheap wine is great for cooking with, if not the best for drinking)
1 Tbsp minced garlic- had
1/2 tsp each of oregano, basil, parsley, thyme, and chili powder-had
With the spices you can really use any that you have, or you can just use an Italian spice.)
 |
| Attempting to cut the meat from the bones |
2 Tbsp soy sauce- had (we used this instead a worcheshire sauce)
salt to taste
Veggies- as much as you want
We added a potato and apple mixed from a previous recipe, 1.5 Cups celery, 6 carrots,
1/4 onion, 2 tomatoes, 1/2 green peppers. All of these were used in other recipes so we had them around the house already. This seemed like a good way of using them before they went bad.
 |
| Ashley cutting the tomatoes for the Stew. |
1.) Mixed 2C water, ramen packets, wine, spices, and soy sauce together. Add meat, you can let the meat marinate in this mixture to allow for more flavor in the meat.
2.) Add previous mixture, veggies, and cover with water in a crock pot. Mix well so that all the flavors mix together.
3.) Let cook on either high for 5-6 hrs or on low for 8-10 depending on how much is in the crock pot. Stir and add water through out cooking.
 |
| The soup simmering. |
FYI this recipe may not sound appealing but it really is good
1 can cream of celery soup-$1
1 can cream of mushroom soup-$1
1 potato cubed-had
2-3 cups apple cider- $4 for a gallon
left over lamb bones and meat
1.) cook the lamb in the apple cider for about 10-20 minutes to get the flavor of the lamb into the cider and vice versa.
 |
| The potatoes covered in the canned soups before adding the liquid mixture. |
2.) In a large bowel drain the liquid from the meat and bone, make sure to set the bone to side.
3.) Add the 2 soups and potatoes to the liquid ad season to taste. Let cook until potatoes are soft. You can add a little flour to thicken, if you want. Also brown beans would be a good addition.
WARNING: This soup will smell good and if you decided to taste it make sure it is cool or you will burn you tongue. It HURTS. :)
The (Bone) Broth
trust me I know it sounds gross.
In a small pot put the lamb/meat from the previous recipes and cover with water. Add 1 Tbsp of vinegar, we used apple cider vinegar, add salt and pepper(be careful using other seasoning as some spices do not like long cook times). Let sit on low heat for 12 hrs for best results.
You can use the broth in other recipes, such as glazes in the future.
For more info on bone broth check out mom's traditional bone broth.
What things have you used in a multitude of recipes like we did with the lamb?
What is your favorite soup or stew?
Sunday, November 7, 2010
Garlic and Parmesan Pasta with Bay Scallops
Looks like it's my turn to write the blog post for the day. And before you say "Hey, I thought this was for people / couples on a budget!" Keep in mind that the scallops were given to us, so no charge there. And now...for the list of ingredients.
Ingredients:
1 Stick of Butter (That's right, Paula!)
1 Pound of Scallops (We used bay scallops, but regular scallops or shrimp would work, too)
Parmesan Cheese (The kind that comes in the shaker)
Enough spaghetti for 2 people
Garlic
Pepper
A pinch of salt (For the pasta)
As you can see, this would make Paula proud. We tried to use 3/4 of a stick of butter, but needed a bit more. With the extra, it came out perfect! =)
1.) Boil a pot of water, then toss the pasta in. Add the salt
2.) In a separate pan, melt the stick of butter on medium until it forms a liquid and starts to bubble. You'll need to stir it to keep it moving, and so it doesn't get burned.
3.) Add the garlic into the butter. As you can see from the picture...we like garlic. =)
4.) Stir the butter for 1 minute, so it has a chance to soak up the garlicky goodness.
5.) Add about 1 tablespoon of Parmesan cheese. This will give the butter an even more wonderful flavor, and a good bath for the scallops.
6.) Drain and put the scallops into the garlic butter mixture. Sprinkle a little pepper on the scallops and butter. We didn't add salt, because there was plenty of garlic in the mixture.
7.) Make sure you stir them, so they don't get too done on one side. The butter should begin to froth up and make a cream. Around that time, the scallops will start to turn white, about 5 to 7 minutes.
8.) When they are just about finished, drain the pasta, and put it into the pan with the butter and scallops. Use a spoon or tongs to move them around, making sure to coat the pasta with the butter sauce.
9.) Instead of using something like corn starch to thicken it, we decided to use more Parmesan cheese...about 3-4 tablespoons more. ;)
10.) Turn the burner off, plate it, add a little more cheese to the top, and eat!
Ashley does not like cooking with fish, so I did most of the cooking for this one. However, once it's cooked...she has no problem digging in. Bonn apatite!
--Ronnie
What kind of stuff do you like adding to your pasta?
 |
| The scallops cooking with butter and garlic before adding the noodles |
1 Stick of Butter (That's right, Paula!)
1 Pound of Scallops (We used bay scallops, but regular scallops or shrimp would work, too)
Parmesan Cheese (The kind that comes in the shaker)
Enough spaghetti for 2 people
Garlic
Pepper
A pinch of salt (For the pasta)
As you can see, this would make Paula proud. We tried to use 3/4 of a stick of butter, but needed a bit more. With the extra, it came out perfect! =)
 |
| Ronnie stirring the scallops, step 7. |
2.) In a separate pan, melt the stick of butter on medium until it forms a liquid and starts to bubble. You'll need to stir it to keep it moving, and so it doesn't get burned.
3.) Add the garlic into the butter. As you can see from the picture...we like garlic. =)
4.) Stir the butter for 1 minute, so it has a chance to soak up the garlicky goodness.
5.) Add about 1 tablespoon of Parmesan cheese. This will give the butter an even more wonderful flavor, and a good bath for the scallops.
6.) Drain and put the scallops into the garlic butter mixture. Sprinkle a little pepper on the scallops and butter. We didn't add salt, because there was plenty of garlic in the mixture.
7.) Make sure you stir them, so they don't get too done on one side. The butter should begin to froth up and make a cream. Around that time, the scallops will start to turn white, about 5 to 7 minutes.
 |
| Step 8 |
9.) Instead of using something like corn starch to thicken it, we decided to use more Parmesan cheese...about 3-4 tablespoons more. ;)
10.) Turn the burner off, plate it, add a little more cheese to the top, and eat!
 |
| The Cats really wanted to try some, sorry kitties. |
--Ronnie
What kind of stuff do you like adding to your pasta?
Saturday, November 6, 2010
Grown-Up Pizza
Ronnie and I decided to cook our own pizza tonight. This may not seem that significant, but we had lots of fun, I even got to play a little (which I will explain shortly).
 Ingredients:
1 Boboli Pizza crust- $5.49 for 2 crusts
(next time we plan on making our own pizza crust)
1/2 pack of pepperoni- $2.99 for pack of 100
1/2 green pepper- $.76 for 1 green pepper
1/4 of an onion- already had
about 8oz Progresso italian sauce -$5.19 for 67oz
Shredded white and sharp cheddar cheese- already had
As you can see we only used a small portion of what we bought, and you will see the rest coming up in later recipes.
You may have guessed this is a fairly easy recipe. You just follow the directions on the back of the pizza crust and that is what we did. The thing that made this recipe so fun/unique for us was the toppings and the preparation behind the toppings. Neither of us have chosen to have green peppers or onions on a pizza before, usually it's just pepperoni and/or cheese. However, after a recent night out with girl friends and trying a pizza like this, I talked Ronnie in to trying it. He was very unsure of it, but decided to put up with my crazy idea. :)
So we set to work. Coming from a family who does not do a lot of home cooking, there are certain devices in the kitchen that hold an appeal or fascination for me. The food processor is one of these devices. Tonight, I got to play with it for the first time, and went to town with it. I shredded the cheese, and sliced the onions and green peppers with it. When I first started the sound scared me when the cheese got to the bottom, and I jumped, which of course caused Ronnie to laugh. :)
So after everything went through the food processor, we put the sauce, cheese, onions, green peppers, pepperonis, and more cheese onto the crust. Once the pizza was cooked, we dug in. Ronnie response was surprised pleasure with the comment, "I guess we are grown ups now". (Thus the name of the pizza) My response was "Of course we are grown up now, we have a couch." :)
Well, I know that this was a very simple recipe. I cannot always promise you a complex recipes, however I do promise more fun stories and unusual creations.
~Ashley
P.S. Next time I want to some how make this pizza have more of a Mexican taste.
Question to the readers:
What unusual toppings have you put on a pizza?
Do you and your significant other like the same type of pizza?

1 Boboli Pizza crust- $5.49 for 2 crusts
(next time we plan on making our own pizza crust)
1/2 pack of pepperoni- $2.99 for pack of 100
1/2 green pepper- $.76 for 1 green pepper
1/4 of an onion- already had
about 8oz Progresso italian sauce -$5.19 for 67oz
Shredded white and sharp cheddar cheese- already had
As you can see we only used a small portion of what we bought, and you will see the rest coming up in later recipes.
You may have guessed this is a fairly easy recipe. You just follow the directions on the back of the pizza crust and that is what we did. The thing that made this recipe so fun/unique for us was the toppings and the preparation behind the toppings. Neither of us have chosen to have green peppers or onions on a pizza before, usually it's just pepperoni and/or cheese. However, after a recent night out with girl friends and trying a pizza like this, I talked Ronnie in to trying it. He was very unsure of it, but decided to put up with my crazy idea. :)
 |
| After going through the food processor. |
 |
| Ronnie with the Pizza out of the oven. |
So after everything went through the food processor, we put the sauce, cheese, onions, green peppers, pepperonis, and more cheese onto the crust. Once the pizza was cooked, we dug in. Ronnie response was surprised pleasure with the comment, "I guess we are grown ups now". (Thus the name of the pizza) My response was "Of course we are grown up now, we have a couch." :)
Well, I know that this was a very simple recipe. I cannot always promise you a complex recipes, however I do promise more fun stories and unusual creations.
~Ashley
P.S. Next time I want to some how make this pizza have more of a Mexican taste.
Question to the readers:
What unusual toppings have you put on a pizza?
Do you and your significant other like the same type of pizza?
Subscribe to:
Comments (Atom)